VPN with Cisco Secure Client on Windows
Preliminary remark
These instructions were created for Windows 11.
However, the Cisco Secure Client also works on Windows 10 and the setup steps for Windows 10 should be very similar to the setup steps contained here.
Troubleshooting help can be found below.
General note
Some restricted services of the University or the State and University Library can only be used when you are on campus, so that the device you use has an address from the area assigned to the University.
To access these services from home or on the road, you must install a so-called VPN client software (Cisco Secure Client) on your device once and establish a connection to the campus with the VPN client before each access to the restricted services. This means that you are "virtually" on campus and can use the services you are used to.
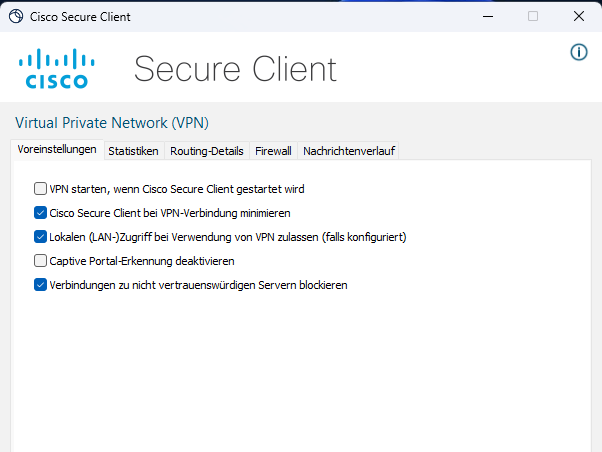
Please note the different types of tunnels and make sure you choose the correct tunnel.


Initial setup - Step 1
Make sure that your device is connected to the internet. Open the website https://vpn.uni-bremen.de, log in with your university account and then download the installation file for the Cisco Secure Client. Then run the file.
If you have connected to the WLAN “Uni Bremen”, the Smart Screen will open first (blue screenshot). Here you must click on “Execute”.
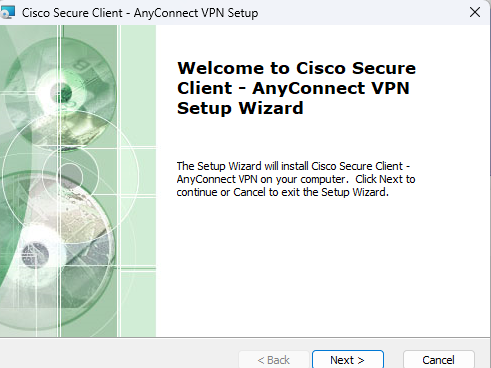
In the Cisco Secure Client Installer welcome screen, click on “Next”.
Initial setup - Step 3
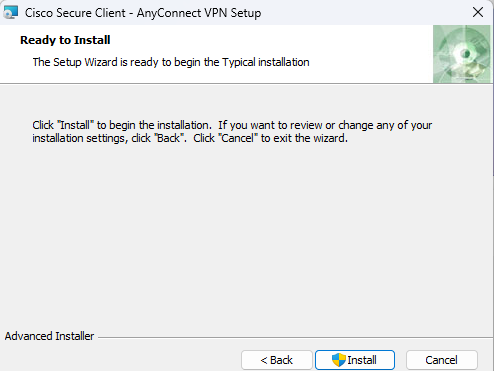
The software will then ask you once again whether you would like to start the installation. Confirm this by clicking on “Install”. If Windows then asks you whether you want to allow the program to make changes to your computer, confirm this too. You will need administrator rights for this. If you do not have these rights, please contact your local IT person.
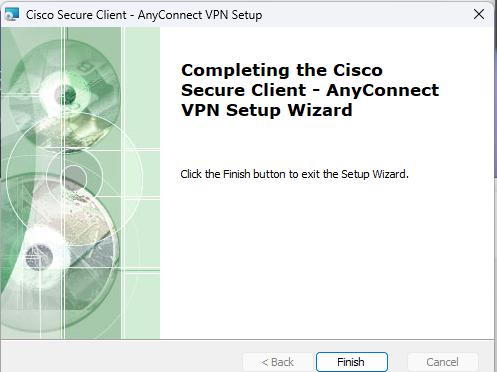
The installation will then take place without any further action on your part. You can then close the installation program by clicking on “Finish”.
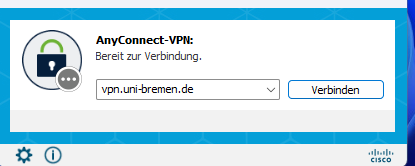
Connect - Step 3
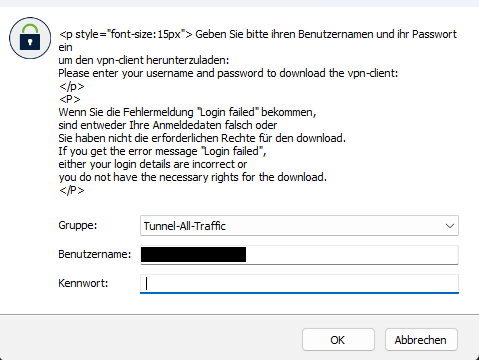
Now enter the access data for your university account in the form of username and password. The access data cannot be saved and must be re-entered each time you connect.
Finally, select the correct tunnel type under “Group” and confirm with “OK”. The program should now establish the connection.

I cannot download the installation file and get the message “Forbidden” instead
Not all university users can access the VPN service. In particular, alumni are excluded from using it.
If you are a regular member of the university (e.g. a regular student or employee) or an employee of the SuUB, please contact the account administration to have the assignment of your account checked.
During installation, the error message “The vpn client agent was unable to create the interprocess communication depot.” appears
This error message is triggered by activated Internet connection sharing. Deactivate the network adapter sharing in the adapter settings and try the installation again.
I have successfully established a VPN connection, but now I cannot use the library's services?
If you want to use services that are activated for the network area of the University of Bremen, but are not “hosted” in the university's network area (publishers are an example here), then you must change the group from “Tunnel-Uni-Bremen” to “Tunnel-all-Traffic” when establishing the connection. For a detailed explanation, please read the page VPN tunnel types.
ATTENTION: With this option, all data traffic is now routed through the tunnel. Please only leave the tunnel activated with this option as long as it is required for working.
