Video conferences with Zoom via Stud.IP
Zoom now has its own Stud.IP plug-in, which makes it easier for you to manage your Zoom meetings in combination with your Stud.IP event. Here you can create new Zoom meetings for your event or import existing Zoom meetings into your event. This way, your students can attend your meetings directly from Stud.IP without you having to send out invitations.
To make it easier for you to get started and use it, you will find the most important information on planning, creating and starting your Zoom meetings in Stud.IP below.
Note: Applies to lecturers and tutors with Zoom authorisation. All employees with an account at the University of Bremen automatically receive this authorisation.
Please note:
These instructions cover the setup and administration of Zoom meetings in your Stud.IP event. If you have any questions about the plugin, please contact the Stud.IP Support. If you have any questions about Zoom, please send an email to the Media Office: videokonferenzprotect me ?!uni-bremenprotect me ?!.de.
Instructions and information on Zoom can be found on the Websites of the Media Office of the University of Bremen. In any case, please mind the VC policy of the University of Bremen.
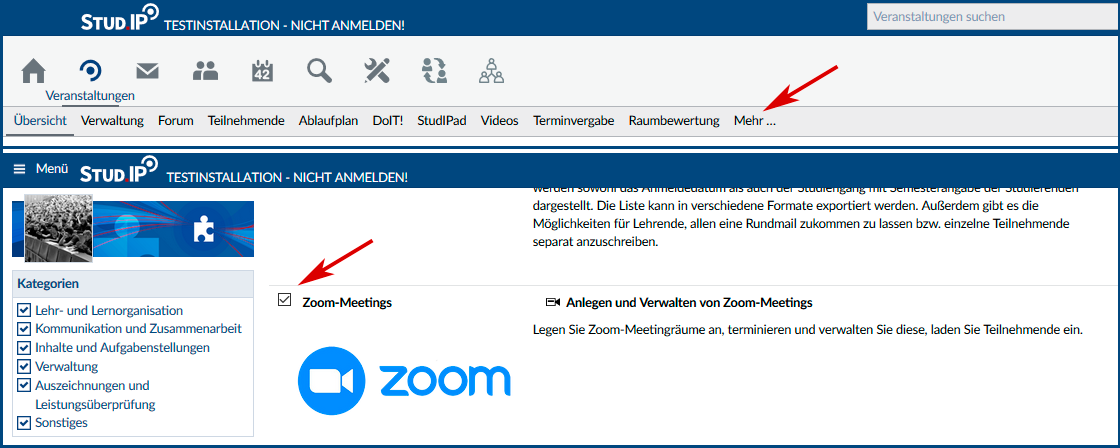
- In the menu bar of your event, click on the last menu item More...
- Activate the plug-in by ticking Zoom Meetings in the Communication and Collaboration section. Zoom Meetings now appears in the menu bar of your event.

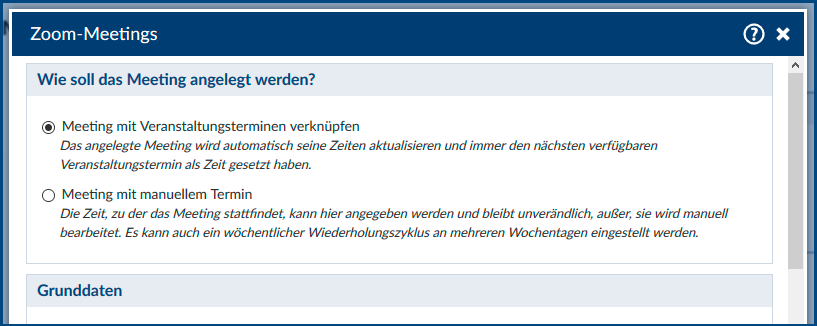
How should the meeting be created?
An additional window will open in which you can make the settings for your meeting.
In the first step you will be asked how the Zoom meeting should be created. Here you have two options.
- Link meeting with event appointments
- Meeting with manual appointment
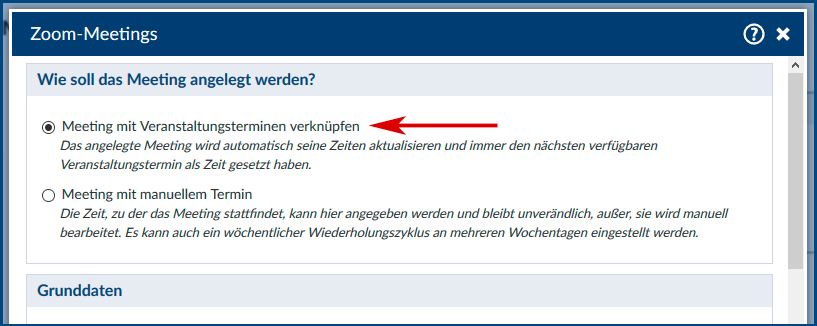
Link meeting with event appointments
Here you create a meeting that has automatically set the next event date as the appointment. If this date has passed, the meeting is automatically moved to the next event date. This means that the meeting is always up to date.
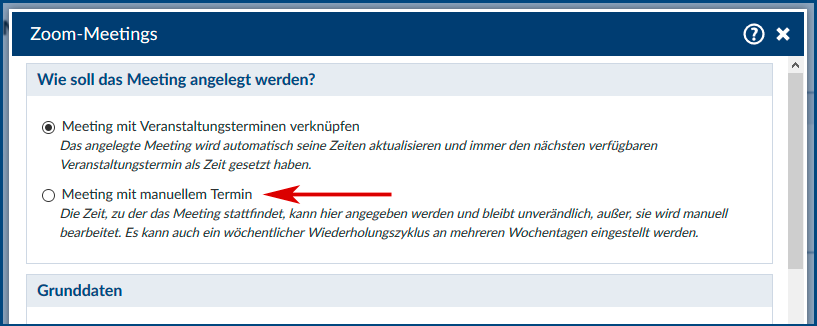
Meeting with manual appointment
Here you define yourself when the appointments and times of the meeting should be. You have the choice between once or weekly. In the case of weekly repetition, the day of the week for the repetition is automatically calculated from your specified day and time and meeting appointments are created until the end of the lecture.
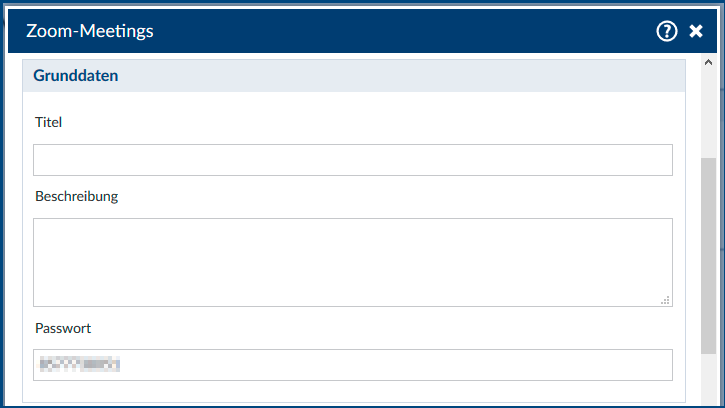
Basic data
In the next step you can manage your basic data. This includes the title of the meeting, a description text and a password. The password is generated automatically, but you can also change it.
With the integration of Zoom in Stud.IP, students no longer need passwords to join a meeting. Students only have to click on Join in the Zoom event and are automatically redirected. The password is automatically coded in the background and does not have to be entered separately. The above password in the basic data therefore only serves as a security mechanism.
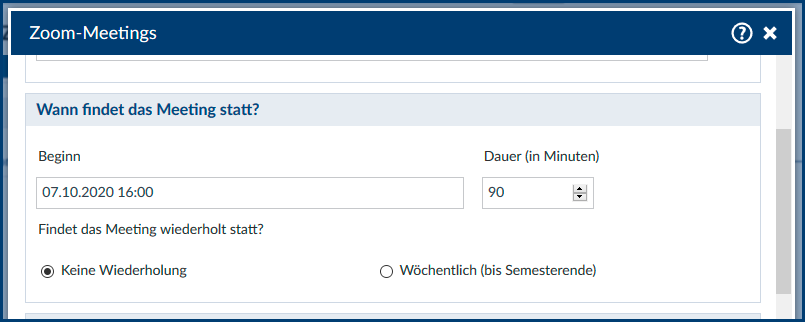
When does the meeting take place?
Only for meetings with a manual appointment:
Select the start and duration of the meeting here. You can also choose between once and weekly.
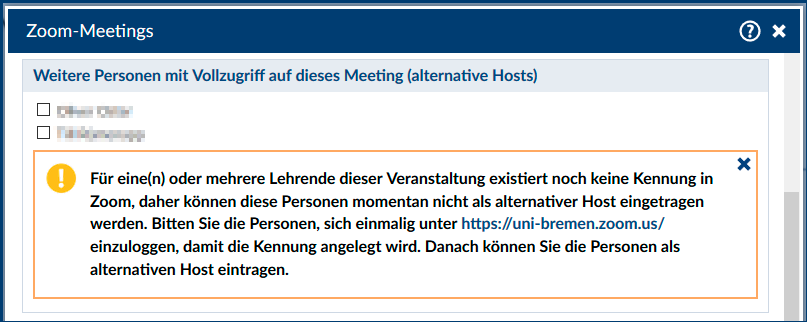
Additional persons with full access to this meeting (alternative hosts)
In the next section you can name additional persons with the status of lecturer or tutor as co-host of your meeting.
When you create a Zoom meeting, you are automatically a host. If you do not nominate other co-hosts, only you may start the meeting. This is especially relevant if you have not activated the option "Participants may enter the room before the host" in the Zoom settings (see step 8). Therefore, it may be useful to designate other lecturers as well.
Co-hosts must have the status of lecturer or tutor in your course. They must also have already logged into Zoom at least once, so that they are known to the system.
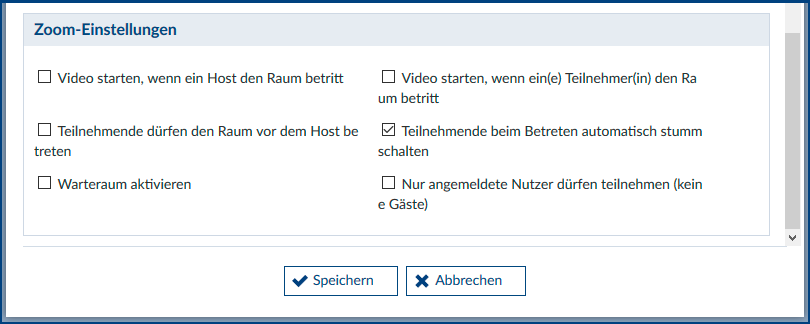
Zoom settings
The last step in these settings is the zoom settings. Here you can make various settings for the zoom meeting.
This selection can also be changed later.

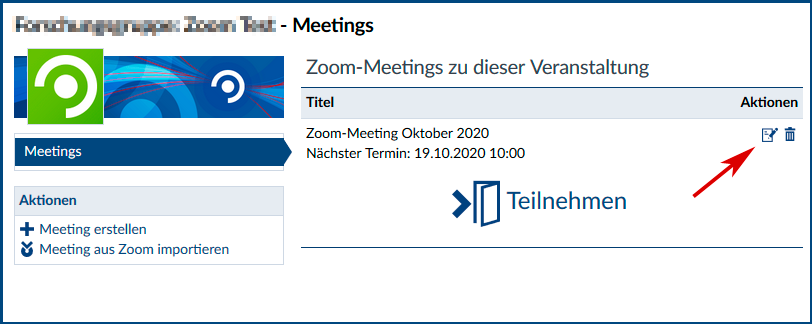
The basic data of a meeting can be changed via the edit symbol in the meeting overview.
If you want to delete a meeting, click on the delete symbol.
Deleting and editing meetings in Stud.IP is only possible for hosts and alternative hosts.
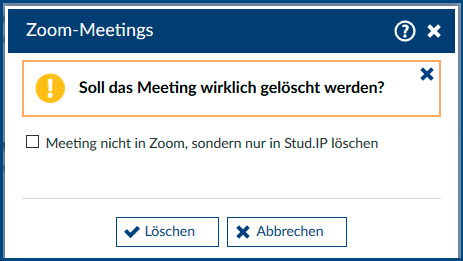
When deleting a meeting, there is also the option to remove the entry from Stud.IP only, but to keep the meeting in Zoom (e.g. to import it in another event). In this case, you must tick the appropriate box.

Select "Zoom" in the tab of your event.
In the left-hand area of this page, click on the option "Import meeting from Zoom".
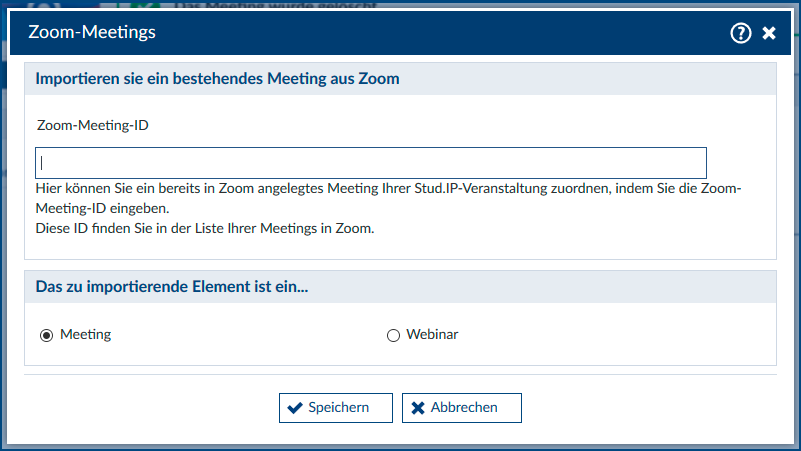
An additional window will open where you can enter the ID of the Zoom meeting you have already created. You can either import a meeting ID or a webinar ID at this point.
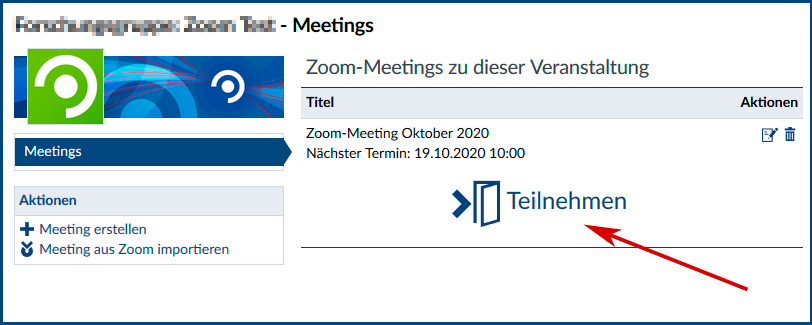
If you want to start the meeting, click on "Join" in the Zoom event.
How do students participate in a Zoom meeting?
Students who are registered for this event will also see this Zoom meeting in the Zoom tab. They too only have to click on "Participate" and can thus take part in the meeting without a password or additional link. For this reason, you no longer need to additionally invite your students or send invitation links.